Friends, it’s snickerdoodle season. If you didn’t know that snickerdoodles had a season, let me paint a picture for you: you’re coming inside on a blustery and colder-than-you’d-expected October day so you hadn’t dressed for it and you can’t wait to announce what my kids always laugh at me for saying when I walk through the door: “Well, that’s enough doing things for me today!” and forswear things like “being outside” and “hard pants” for the rest of the evening but what is this! What is this god-like aroma of buttery baked cinnamon sugar warmth that has permeated your senses? Is it a scented candle, i.e. the idea, but not the substance of a thing you love? No, it’s snickerdoodles. And you’re about to eat a warm one, which feels like climbing inside It’s The Great Pumpkin, Charlie Brown while also, simultaneously, getting to be this dog. I’m not saying you cannot experience this sensory transcendency on a day in January or June, but it hits on a different, worldview-shifting, level when cold air is still a novel thing.

In 2009, exactly one day before I had my first kid, I shared a recipe for classic snickerdoodles, the old-fashioned kind with cream of tartar and baking soda instead of baking powder that cool to flatten a bit with crisp edges. They’re delicious, contest-winning, and going to stay in the archives exactly as they are. But, as I bit into them a few weeks ago, a vision crystalized in my head of what they’d be if they were, say, the mic drop of the snickerdoodle category, seven words I’m pretty sure nobody has had the impenitent cringe to string together before. A few weeks of tinkering later, they’re here and I can’t shut up about them. A few things set them apart:


- Thicker and more tender: They’re not cakey, but have an incredibly quiet bite yet softly crisp edges. They get that way the same way my confetti cookies do: with the addition of a little cream cheese. This also gives what is usually a classic drop sugar cookie — good but hardly exciting — needed complexity.
- Brown butter: While my brown butter fanaticism is well-established, I like to limit its usage to places where you can really taste it, and my word, here we really do.
- Vanilla bean: I briefly wondered if adding vanilla bean paste would add more of a Pinterest keyword pileup than actually improve the flavor and then I tried it and I was very wrong. It’s heavenly here.
- My favorite cinnamon: No, it’s not mandatory but my forever favorite, Burlap & Barrel’s Royal Cinnamon, is a particular treat here. Be like crazy Deb and buy it in one-pound bottles. Share it with friends, if they’re nice.
This is my forever snickerdoodle recipe, the last I’ll ever need, and I can’t wait for them to win a spot in your permanent repertoire too.

Brown Butter Snickerdoodles
- 1 cup (8 ounces or 225 grams) unsalted butter (see Note)
- 3 tablespoons (45 grams) water (see Note)
- 3 cups (400 grams) all-purpose flour
- 1 1/4 cups (250 grams) granulated sugar + 3 tablespoons (40 grams) for rolling
- 1 teaspoon baking powder
- 1/4 teaspoon baking soda
- 1 1/2 teaspoons kosher salt (Diamond brand, use half of others)
- 1/4 cup (2 ounces, 55 grams or 1/4 of an 8-ounce brick) cream cheese, in chunks
- 1 large egg
- 1 1/2 teaspoons vanilla extract or vanilla bean paste
- 1 1/2 tablespoons (10 grams) ground cinnamon
Chill the browned butter: We want to freeze the butter until it’s solid throughout but trust me, this speeds it up: Freeze the butter in the bowl for 30 minutes then give it a full stir, scraping down the sides, mixing the still melted parts in the center over the solidified chunks. Return to the freezer for another 15 to 30 minutes — it should now be firm throughout. Cut it into chunks, right in the bowl. No need to make them even.
To make the cookies in a food processor: Place the flour, 1 1/4 cups (250 grams) of the sugar, baking powder, baking soda, and salt in the work bowl of your food processor and pulse to blend. Add your cold brown butter chunks and cream cheese and pulse and blend until all visible pieces disappear and the mixture looks like breadcrumbs. Add egg and vanilla and blend until mixture is fully combined, scraping down as needed (dough will look like boulders) then keep running the machine for approximately another full minute, until the dough mixture looks thick and smooth.
To make with an electric mixer: Place the flour, baking powder, baking soda, and salt in a bowl and whisk to combine. In a large bowl or the bowl of a stand mixer, beat cream cheese, chilled brown butter, and 1 1/4 cups (250 grams) of the sugar until fluffy. Add egg and vanilla and blend again, scraping down the bowl as needed. Add flour mixture and beat just until flour disappears. In some cases, dough made with this method will feel too soft to roll into balls in your hands; if so, let it chill in the fridge for 20 minutes or so before using.
Heat oven: To 375°F (190°C)
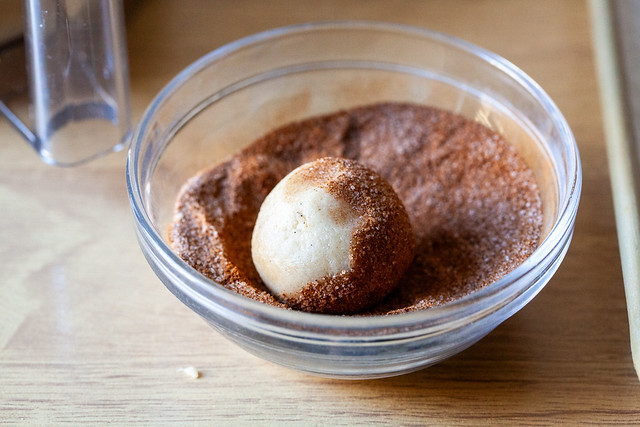
Finish the cookies: Line two large baking sheets with parchment paper. In a small bowl, combine remaining 3 tablespoons (40 grams) granulated sugar and all of the cinnamon. Scoop cookie dough into 1.5-tablespoon-sized balls (I’m using a #40 scoop), roll briefly in your hands to smooth them, then roll them in the cinnamon sugar mixture before placing on the prepared baking sheet. Use your fingers to slightly flatten (picture: 1/3 of the way) each dough ball. Repeat with remaining cookies, spacing them two inches apart.
Bake cookies: For 10 to 11 minutes. They will still feel very soft and underbaked on top but they will set up as they cool, promise. Let the cookies rest on the baking sheet for 2 minutes, then transfer the cookies to a rack to finish cooling.
Do ahead: These cookies keep for one week in an airtight container at room temperature.
Notes:
- Basic butter: I’m calling for basic, non-European, regular butterfat butter here — you know, the kind that comes in a 1-pound box with four “sticks” at most American grocery stores; store brands are fine. [If you’d like to use a fancier, higher butterfat butter, you’ll want to add back less water after browning the butter.]
- Why the water: When you brown butter, the water content of the butter cooks off (that’s what causes all of that sputtering in the pan) and we want to add it back to ensure that the cookies have the perfect tender texture. I used to measure the water loss by volume and would recommend adding just shy of 1 1/2 to 2 tablespoons of water back per 1 cup of butter. But recently I’ve begun weighing my brown butter instead and was surprised to learn that what began as 227 grams of butter became 186 grams after browning (i.e. minus 41 grams), meaning you’d want to add 2 tablespoons plus 2 teaspoons of water (40 grams) back. However, I found these cookies had the best texture rounding this to 3 full tablespoons (45 grams) of water, and call for it here. Was that super nerdy? Yes. But I know someone was going to ask!